

Key Takeaways
Caulk Failure
Caulk failure occurs when a sealant loses its bond to a surface, cracks, shrinks, or deteriorates to the point where it no longer blocks moisture, air, or pests. It's a normal part of a material's lifespan, but where it fails determines whether it's a minor cosmetic issue or a problem that needs prompt attention. Not every crack requires immediate action, but some locations carry real consequences if ignored.
Caulk is a flexible sealant - typically silicone, latex acrylic, or a hybrid - designed to bridge the movement between two surfaces. When that flexibility is exceeded by thermal expansion, substrate movement, or material aging, adhesion breaks down.
Why Caulk Fails in the First Place
Caulk is not a permanent fix - it's a flexible, consumable sealant designed to accommodate slight movement between surfaces while keeping water and air out. Every type breaks down eventually. The question is why it fails when it does.
The most common culprits are:
- Age and UV exposure: Caulk dries out and becomes brittle over time, especially on sun-facing exterior surfaces.
- Surface movement: Homes expand and contract with temperature changes. Caulk that can't keep up with that movement will crack or pull away from the substrate.
- Moisture during application: Caulk applied to a damp surface or in high humidity often fails to bond at all, peeling within weeks.
- Wrong product for the location: A latex caulk used in a continuously wet shower will degrade far faster than one rated for that environment.
- Inadequate surface prep: Old soap residue, mold, or loose material under a new bead prevents adhesion from the start.
Understanding what caused the failure helps you fix it correctly the first time. Skipping the diagnosis and just re-applying is one of the most common DIY mistakes with caulk.
Prep Is the Whole Job
Experienced re-caulkers consistently report that surface preparation takes more time than the actual application - and that's correct. A perfect bead of caulk over a damp, dirty, or incompletely stripped surface will fail within months. Spend 80% of your effort on prep and the repair will last years longer.
Where Caulk Failure Actually Causes Damage
Not all failing caulk is equal. A hairline crack in the caulk around a bedroom baseboard trim is aesthetically imperfect but structurally meaningless. Failed caulk at the base of a shower surround is a different situation entirely.
High-Risk Locations
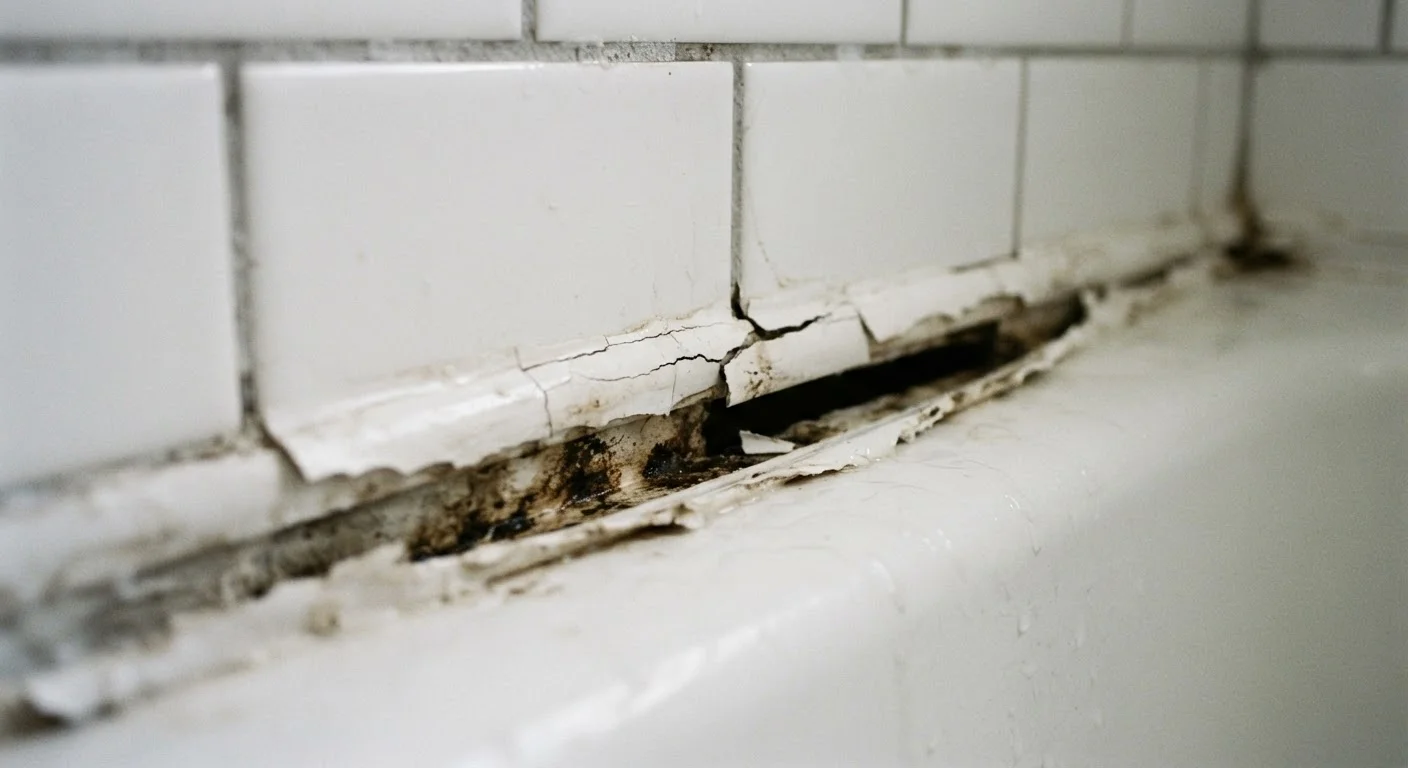
- Tub and shower surrounds: The joint between a tub deck and tile wall is a constant target for water. When the seal fails here, water infiltrates behind the tile, into the wallboard, and eventually into the subfloor. The damage is often invisible until it's extensive.
- Sink and countertop edges: Water that gets under a countertop edge repeatedly will rot particleboard cabinet boxes and encourage mold inside enclosed spaces.
- Exterior window and door frames: Failed exterior caulk allows both water intrusion and air infiltration. Over time, water entry leads to wood rot in framing, while air leaks contribute to energy loss.
- Roof penetrations and flashing joints: Any caulked joint near a chimney, vent, or skylight that fails is a direct path for water into the structure. This is not a DIY re-caulk situation - a roofing professional should assess and repair these.
Lower-Risk Locations
- Interior trim in dry rooms
- Crown molding joints
- Decorative tile in low-moisture areas
The cost of deferring wet-area caulk repairs compounds quickly - what costs a few dollars in materials today can require a full bathroom gut in a few years.
~$15
Typical cost to re-caulk a tub surround
Material cost for a standard DIY re-caulk job using a quality bath caulk, compared to water damage repairs that can run into thousands of dollars.
25-30%
Home heat loss through air leaks
The U.S. Department of Energy estimates that air infiltration - including through gaps around windows and doors - accounts for a significant share of home heating and cooling energy loss.
3-7 years
Typical lifespan of wet-area caulk
Industry guidance generally places shower and tub caulk replacement intervals in this range, though application quality and product type affect longevity significantly.
How to Fix It Without Wasting Money
Re-caulking is one of the more genuinely cost-effective DIY repairs a homeowner can do. The materials are inexpensive, and the skill threshold is achievable for most people willing to take their time on prep work.
The Process That Actually Works
- Remove all old caulk completely. Use a caulk remover tool or utility knife. Chemical caulk softeners can help in stubborn cases. Leaving any old material behind compromises the new bond.
- Clean and dry the surface thoroughly. Use rubbing alcohol or a dedicated cleaner to remove soap scum, mildew, or residue. The surface must be fully dry - allow 24 hours after a shower if needed.
- Apply painter's tape for clean lines. This step slows you down but prevents the uneven bead that makes amateur work look amateur.
- Apply a continuous, steady bead. Don't stop mid-joint. Tool the bead immediately with a wet finger or caulk tool, then remove the tape before it dries.
- Allow full cure time before water exposure. Most products label a minimum of 24 hours, but 48-72 hours in wet areas is a more reliable standard.
Choosing the right caulk type for the location matters as much as application technique. Our guide to silicone vs. latex caulk covers the key differences to help you pick correctly before you buy.
If you open up the joint and find soft substrate, discoloration, or mold, stop and assess before proceeding. Caulk over damaged material is not a repair - it's concealment. In those cases, knowing when to call a professional protects you from compounding the problem.