

Key Takeaways
Why a Running Toilet Deserves Immediate Attention
A toilet that won't stop running is easy to dismiss as a minor annoyance, but the water waste is substantial. A continuously running toilet can lose 200 or more gallons per day - translating directly into higher water bills month after month. As explored in The Hidden Costs of Skipping Small Home Repairs, what looks like a trivial issue often compounds into real expense when ignored.
The good news: the mechanical system inside a toilet tank is straightforward. There are no soldering joints, no complex fittings, and no permit requirements for standard tank component replacement. Most homeowners with no prior plumbing experience can diagnose and resolve the problem in under an hour. The parts involved - flappers and fill valves - cost a few dollars at any hardware store.
Confirm the Leak With a Dye Test
Drop a few drops of food coloring into the tank and wait 10-15 minutes without flushing. If color appears in the bowl, your flapper is leaking. This simple test removes guesswork before you buy any parts and takes under five minutes to perform.
What You'll Need Before You Start
Gather your tools and replacement parts before shutting off the water. Having everything on hand prevents interruptions mid-repair.
What you will need
Adjustable Wrench
Used to loosen and tighten the fill valve locknut when replacing the fill valve assembly.
Replacement Flapper
Replaces a warped or degraded flapper that fails to seal the flush valve opening.
Replacement Fill Valve
Replaces a faulty fill valve that causes the toilet to run continuously or fill too slowly.
Sponge or Shop Towel
Absorbs remaining water from the tank bottom after shutting off supply, keeping the work area dry.
One note on parts purchasing: resist the urge to guess on the flapper size. Toilet flappers vary by flush valve diameter (2-inch and 3-inch are most common), and an ill-fitting flapper will continue leaking even when new. When in doubt, bring the old part to the store or note your toilet's make and model from the inside of the tank lid.
Step-by-Step Repair Instructions
Work through these steps in order. If you're unsure which component is causing the problem, complete the diagnosis in Step 1 before purchasing anything.
Turn Off the Water Supply First
Before opening the tank or touching any components, locate the shutoff valve on the wall behind or beside the toilet base and turn it fully clockwise. Skipping this step risks an uncontrolled water flow that can flood your bathroom floor. Once the valve is off, flush once to drain the tank so you can work on dry components.
Diagnose the source of the running water
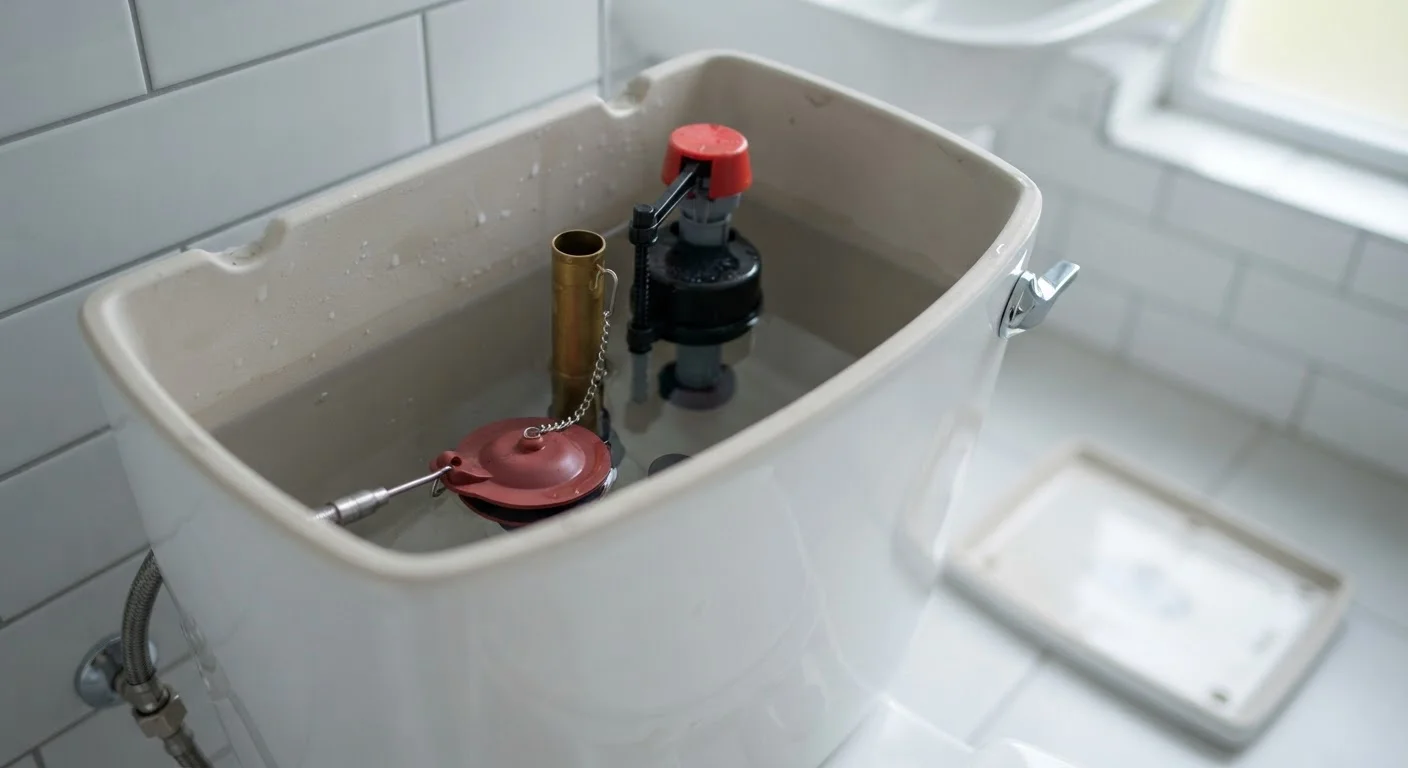
Remove the tank lid and set it safely aside on a flat surface - tank lids are ceramic and break easily. Listen and look: if water is trickling into the bowl, the flapper is likely the culprit. If water is spilling into the overflow tube (the tall plastic pipe in the center of the tank), the float is set too high. Conduct the food coloring dye test to confirm a flapper leak before purchasing parts.
Shut off the water supply and drain the tank
Turn the shutoff valve clockwise until it stops. Flush the toilet to drain the tank as fully as possible. Use a sponge to soak up the last inch or two of water from the tank bottom. This prevents water from getting on the floor or into components while you work.
Replace the flapper if it is worn or warped
Unhook the flapper ears from the pegs on either side of the flush valve. Disconnect the chain from the flush handle arm. Take the old flapper with you when purchasing a replacement to ensure a proper match - flappers are not universal. Snap the new flapper ears onto the pegs and reattach the chain, leaving about half an inch of slack. Too much slack prevents a full flush; too little keeps the flapper from sealing.
Adjust the float if water is entering the overflow tube
The water level in the tank should sit about one inch below the top of the overflow tube. On a ball-float system (older toilets with a ball on a metal arm), bend the arm slightly downward or turn the adjustment screw to lower the float. On a cup-float or cylinder-float system (most modern toilets), pinch the clip and slide the float cup down the fill valve shaft, or turn the adjustment screw counterclockwise. Restore the water supply briefly, let the tank fill, then recheck the level.
Replace the fill valve if it is faulty
If adjusting the float doesn't stop the running, or if the fill valve hisses and runs even when the tank is full, the fill valve itself may need replacement. With the water off and tank empty, use an adjustable wrench to remove the locknut on the underside of the tank where the water supply line connects. Lift out the old fill valve. Insert the new valve, following the manufacturer's height adjustment instructions, then hand-tighten the locknut before snugging it with the wrench - avoid overtightening on the plastic nut. Reconnect the supply line and turn the water back on slowly.
Test and confirm the repair
Turn the shutoff valve fully counterclockwise to restore supply. Allow the tank to fill completely, then observe for two to three minutes. The fill valve should shut off cleanly once the water reaches the correct level. Flush once and watch the flapper reseat and the tank refill. Repeat the dye test if you want to confirm no residual leak. Replace the tank lid only after verifying everything is working correctly.
If you find yourself unsure about any step or encounter corrosion that makes components difficult to remove safely, stopping and calling a licensed plumber is the right call - particularly for older toilets where brittle parts are more common. As a reminder, common DIY myths often lead homeowners to overcomplicate straightforward repairs or underestimate when professional help is warranted.
After the Fix: Reducing Water Waste Long-Term
Once your toilet is running quietly, it's worth thinking about water efficiency across the home. The same discipline that prompts you to fix a running toilet - catching small waste early - applies equally to irrigation habits. If you water your lawn or garden, smart watering practices can cut outdoor water use significantly without any impact on plant health.
Inside the home, your water heater is another major consumer. Cutting hot water costs outlines practical adjustments that reduce consumption meaningfully. Together, these habits - fixing leaks promptly, watering efficiently, and managing heating - give homeowners measurable control over monthly utility costs without requiring expensive upgrades or professional services.
Don't Force Corroded or Brittle Parts
Older toilets may have plastic components that have become brittle with age. Applying excessive force when removing a flapper or fill valve can crack the flush valve seat - a repair that requires more invasive work or professional help. If a component feels stuck, soak it with a little white vinegar and wait a few minutes before trying again.